
Thursday 22 November 2012
Tuesday 20 November 2012
Contemporary Christmas Angel
This card was made last night although I have been tinkering and not posting (tut tut) 

So I decided to share the first thing I did with my new scalloped dies with you, and it was an easel card as you can see.

Firstly you have to cut the large circle, this one is almost six inches as that is the biggest my Bigshot will take (the Cuttlebug is the same size as far as I am aware). To do this you have to fold a piece of card in half I used A4, and leave a small amount of the die sticking out of the side so you still have a crease to create a card after it is cut.
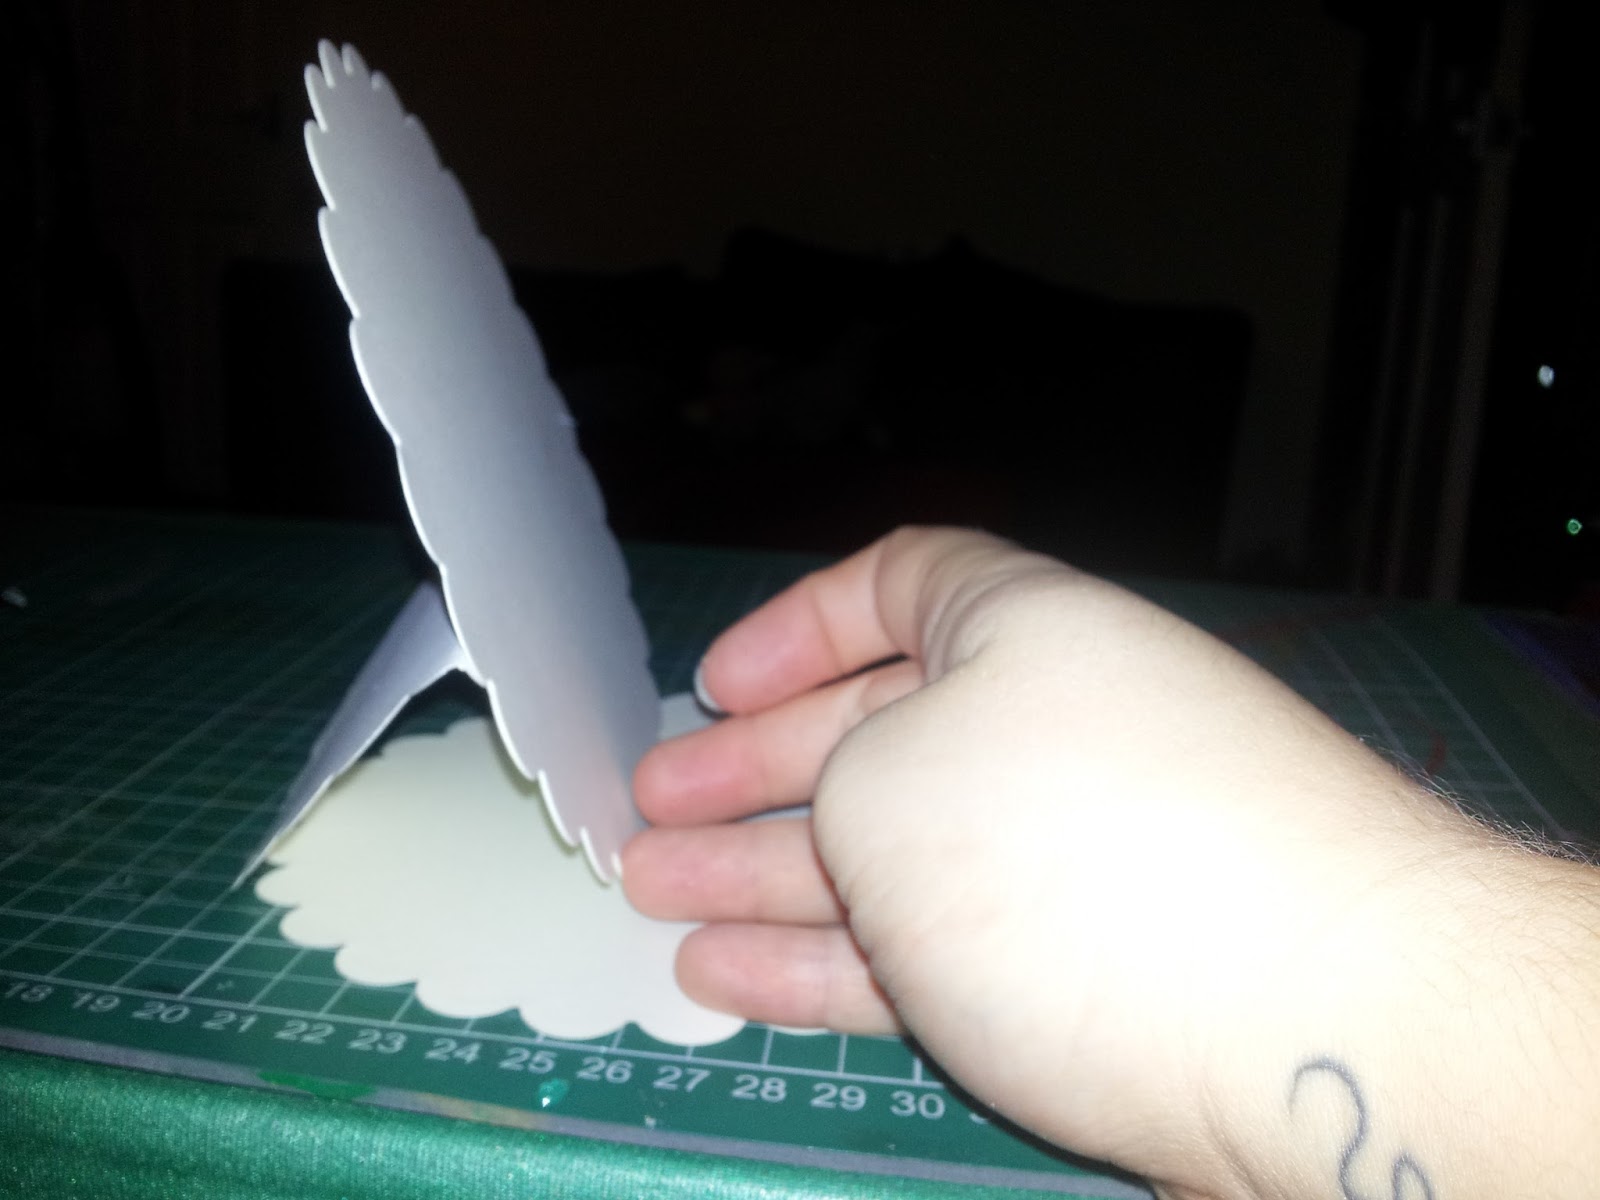

Fold the top scalloped circle in half, mine wasn't quite half but it doesn't matter too much as long as it is close enough. You then have to cut another circle the same size as your main card, stick it on like in the picture >.
Now you are ready to create your topper.
Now time for more cutting.
< this picture shows the main topper card also but you don't need another one of these this was for the step above, what you do need is one of the size below your main card and two of the size smaller than your second size (hope I make sense).

What I choose to do was emboss these circles, the larger one I placed embossed (bumpy) side up, and the size smaller de-bossed (not so bumpy) side up.

I then embossed the base cards topper also, placed embossed side up. The sentiment came from 'My paper stash' who have created a lovely A4 page of card ribbons. All that is left now is to add a focus point I choose a lovely picture I found on DeviantART, can't remember the artist from the top of my head but if you like it it's on my Pintrest and full credit is given there ( digital stamp board )
ENJOY!!!!! See you all again soon oh and head to the freebies page I am adding more there too.These will be changing over the next few days into separate pages, as all themes are in one place at present and I don't like that as its not easy to get around.
Wednesday 14 November 2012
Magical Christmas
When I made this card I must of had what my husband would like to receive in mind.
I found the outline drawing on Google, and coloured it in with promarkers.
I hope you like it as it is a little different to what you normally see at Christmas.

Monday 12 November 2012
Dingle Dangle Scarecrow Tag
Hi all hope your doing fine today. This has just been rushed together for a blog challenge through crafty emblies, the theme was a nursery rhyme. Hope you all like it xxx.

Sunday 11 November 2012
Crafty-Emblies
This is where I get the lovely wooden embellishments from. She has some lovely lovely pieces on here, and lots of ideas on what to do with them. Better still its not just embellishments there are boxes and mini scrapbooks too.
Enjoy browsing I just know you will like it.

Crafty-Emblies
Enjoy browsing I just know you will like it.
Crafty-Emblies
Thursday 8 November 2012
Jump up card

To make this card you will need-
Card
Scoring board/Mouse mat
Embossing tool
Double sided Tape
Embelishments

Firstly you have to cut a piece of A4 card lengthways. I used a heavy card stock but to practice you can use thick paper.
 Next you have to score along these lines and to do this (as its not very clear in the pictures). Firstly place the short edge against the edge of your board or if you don't have one turn the paper that way and make sure it is square you don't want a 'wonkey' card now, The lines are made at A4 gate fold and A4 half fold this is approx 7 1/2 cm (3 in) down and approx 15 cm (6 in) down. Then you have to fold the first line (3 in) up and butt that against the edge/ make square, and put notches at half fold A4 and then turn lengthways and make a notch at gate fold A5. You then have to join the lines to make a diamond shape, the bottom lines go all the way down to your first fold.
You are now ready to embellish your card.
I stuck to triangles but you don't have to.
Enjoy trying this card it is super easy I will try and get more made up so you can see the different ways to matt and layer and embellish.
Wednesday 7 November 2012
Shona-Rose's Butterfly Easel Card

Tuesday 6 November 2012
Paper Rose Tutorial
 For this project you will need - A flower punch with five petals, an ink pad, strong clear glue, and thick paper/thin card I used 170gsm and a cocktail stick. Apologies for this not being posted yesterday when I did it, but I was decorating my living room so didn't have the time.

Punch three flowers and find the centre point on all of them, and draw the lines like I have (above). You can now ink the edges you do this on the other side though I did it on the same side for demonstration purposes, and cut the petals out where you drew your lines just like the picture to the right.
 Now its time to assemble your rose. To do this you take the complete flower with just a cut to the centre and glue the edges together, this creates a small bowl like shape. You then have to repeat this for all the other petals, although I found it easier to curl them first with a cocktail stick, then glue so the paper didn't tear.
 Once this is done you can build the Rose up. To do this you put some clear glue in the bottom of the largest flower, snip the very tip of the base off the next size flower and stick. You repeat this process for each flower but taking a little extra off the end each time. By the time you get to the single petal to put in the centre you almost cut it in half so don't be alarmed and think you are cutting too much off.
After you have assembled your Rose, you can then curl the edges by rolling them round a cocktail stick (I use a metal tool from my fly tying kit) this is done to your own taste I did some tighter than others as you can see in the top picture.
Saturday 3 November 2012
Paper watering can
 hello there, today I have been making a 3D watering can.
You can find the template here on splitcoast stampers webpage- splitcoast stampers.
hello there, today I have been making a 3D watering can.
You can find the template here on splitcoast stampers webpage- splitcoast stampers.I hope you have all been having fun trying new things or just crafting in general.

firstly you have to cut out the template and fold the flaps (if that is the correct terminology), and all four sections in I don't currently own a scoring board, so have to do it free hand just takes a little longer is all.

I had to make a little slit in the main part of the template, as I stuck
the long piece of the spout before I realised I had folded it wrong,
and the red tape didn't want to budge so stayed with it and improvised.
You wouldn't normally fold it in half, each part folds at the end of the rectangle, makes it look 3D.

To make the flower bellow I used two different sized flower punches.
With the large flower punch I punched 4 with two different although complimenting papers from the rose garden collection.
With the smaller punch I cut 7 with the same paper. It was the same as one of the larger flowers as there was a lot more colour difference in the particular design .

To assemble the paper flower I stacked the large flowers (yellow then pink) while offsetting each one.
I did the same with the smaller flowers, then distressed the edges of all the layers and finished of with a pearl gem.
To glue everything on I used UHU Power glue as it is clear drying, and if it seeps out the edges a little just wait for it to go tacky and it rubs away.You can use the glue designed for crafter's although I feel, the only differences are the price and smell.

Just to add the paper pack was free in Quick Cards Made Easy magazine, but sshhh it's a secret.

Thursday 1 November 2012
 For this card I used my tulip stamps and linen paper.

I then cut my backing papers and placed them along with the stamps onto the backing card (these where changed around a good few times), just to see if they were to my liking.

I then added double sided tape to all of my backing material and stuck them down. Now for the stamping, I used pigment ink for the outline and promarkers for the colouring in. The pigment ink hadn't completely dried when I coloured in as you can see from the mark on her face where the ink was smudged. The main stamped image was die cut with a Spellbinders labels 14 die.
I really hope that this has been a good first post.
Enjoy xxx
I have only been card making a few months, and would like to share as I learn new techniques and skills. It would be lovely if more experienced or novices like myself, would share there skills and ideas so we can, all learn something new or just how to improve what we are already doing. This is also my first ever blog, hopefully it I will improve as I go on, and learn how to add great sites for us all to look on.
Subscribe to:
Posts (Atom)